Professional home inspector tools including moisture meter, thermal camera, and GFCI tester – Mason Home Inspections Minnesota

When you schedule a home inspection with Mason Home Inspections, you’re not just getting a walk-through and a clipboard checklist. You’re getting a detailed assessment backed by professional training and the right tools to find things most people wouldn’t notice.

Whether you’re buying your first home in Chisago County or selling a lakefront cabin near Center City, the tools used during your home inspection play a key role in helping you make confident, informed decisions.

Let’s take a closer look at the essential tools used by Mason Home Inspections — and why they matter.


Moisture Meter

Water damage is one of the m

ost common and costly issues found in homes. I use both pin-type and pinless moisture meters to check for hidden leaks behind walls, under flooring, and in ceilings. These tools help identify areas with elevated moisture that could lead to mold or structural damage, especially in bathrooms, kitchens, and basements.


Thermal Imaging Camera

I use an infrared thermal imaging camera to detect temperature differences in walls, ceilings, and floors. This tool can reveal:

  • Missing insulation

  • Electrical hotspots

  • HVAC duct leaks

  • Moisture intrusion

While thermal imaging isn’t always needed in every inspection, it’s a powerful way to catch hidden issues that aren’t visible to the naked eye.


Electrical Testers

A home’s electrical system must be safe and up to code. I carry:

  • Non-contact voltage testers to check for live wires

  • Multimeters to test voltage and continuity

  • GFCI outlet testers to ensure ground fault protection in kitchens, bathrooms, and garages

These tools allow me to verify that outlets are wired correctly and safely.


Gas Leak Detector

If your home uses natural gas or propane, a gas leak detector is used around appliances and pipes to ensure there are no leaks. Even a small leak can become a serious safety hazard, so this is a key part of any home ins

pection.


Flashlights and Headlamps

Some areas of a home are dark or hard to reach — think crawlspaces, attics, and utility closets. I use high-lumen LED flashlights and hands-free headlamps to fully inspect every nook and cranny. Poor lighting won’t stop me from getting a clear view of your home’s condition.


Ladders

Access to attics, roofs, and elevated areas is made possible with telescoping ladders. These are compact, portable, and sturdy. While I do not use drones, I always visually inspect roofs from the ground or from a ladder when it is safe and practical to do so.


Inspection Camera (Borescope)

When needed, I use a borescope camera — a small camera on a flexible cable — to inspect tight spaces like wall cavities, HVAC ducts, and under cabinetry. This tool is excellent for identifying hidden damage, pest activity, or wiring issues in hard-to-reach areas.


Level and Plumb Tools

Crooked floors or misaligned walls may point to deeper structural issues. A bubble level or digital level helps identify sloping or settling. While cosmetic in some cases, unevenness can also be a red flag for foundation movement or poor workmanship.


Measuring Tools

Measurements matter. I use tape measures and laser distance meters to check room dimensions, window height, stair rise/run, and other key components. This ensures things are built to standard and meet code.


Carbon Monoxide and Combustion Gas Detectors

To keep you and your family safe, I use CO detectors to check for carbon monoxide near furnaces, water heaters, and gas appliances. These silent threats can go unnoticed, so this check is a critical part of any inspection.


Mobile Reporting Software

At Mason Home Inspections, I use professional reporting software (Spectora) on a tablet to document findings, capture photos, and create clear, detailed inspection reports. You’ll receive a modern, mobile-friendly report that highlights key issues with visuals, descriptions, and recommendations — typically delivered the same day.


Final Thoughts

Having the right tools matters. At Mason Home Inspections, each inspection is backed by experience and the best equipment to give you an honest, thorough look at the home’s condition. These tools help uncover what you can’t see, giving you peace of mind before signing on the dotted line.

If you’re buying, selling, or simply want a better understanding of your home’s condition, schedule an inspection today with a licensed Minnesota home inspector who brings the right tools — and the experience to use them.


Ready to book your home inspection?
Call Mason Home Inspections at 651-786-9988 or visit masonhomeinspections.com to request an appointment.

Furnace lifespan

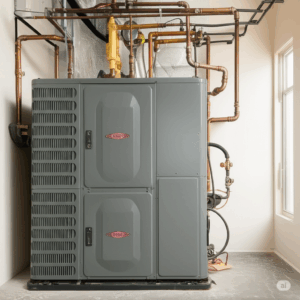
When you’re navigating the process of buying or selling a home, a home inspection is a crucial step. At Mason Home Inspections, we provide thorough evaluations of properties to help you understand their current condition. One common area of concern for both buyers and sellers revolves around the age and expected lifespan of major home systems. Knowing the typical lifespan of items like your water heater, furnace, and AC condenser unit can provide valuable insight into potential future expenses and maintenance needs.

During a home inspection, we meticulously examine these systems to assess their functionality and identify any visible issues. While we can’t predict exactly when a system will fail, understanding their typical lifespans can help you plan accordingly. Here’s a closer look at what you can expect:

Water Heaters: The Unsung Workhorse

The average lifespan of a residential water heater is typically between 10 to 15 years. Several factors can influence this, including the quality of the unit, the frequency of maintenance, and the hardness of your water. Sediment buildup, for instance, can significantly reduce a water heater’s efficiency and lifespan. During our home inspections, we’ll note the age of the water heater and look for signs of corrosion or leaks, which can indicate a unit nearing the end of its service life. Regular maintenance, such as flushing the tank to remove sediment, can help prolong its lifespan.

Furnaces: Keeping You Warm Through the Years

A well-maintained furnace can often last between 15 to 20 years. Like water heaters, the lifespan of a furnace depends on several factors, including the quality of the unit, how well it has been maintained, and the frequency of use. Annual servicing by a qualified HVAC professional is highly recommended to ensure optimal performance and longevity. During a home inspection, we’ll assess the age and visible condition of the furnace, looking for signs of rust, corrosion, or operational issues. Understanding the age of your furnace can help you anticipate when a replacement might be necessary.

AC Condenser Units: Staying Cool and Comfortable

The AC condenser unit, responsible for cooling your home, generally has a lifespan of 10 to 15 years. Exposure to the elements can take a toll on these outdoor units. Regular cleaning of the coils and ensuring proper airflow can help extend their lifespan. During our home inspections, we’ll examine the age and physical condition of the condenser unit, checking for signs of damage, leaks, or corrosion. Knowing the age of your AC unit can help you budget for potential future replacements, especially in regions with hot summers where the unit sees frequent use.

Understanding the lifespan of your home systems can save you money and enhance your comfort.

Why Age Matters in a Home Inspection

While the age of a system isn’t the sole determinant of its condition, it’s an important factor to consider. Older units are generally more prone to breakdowns and may be less energy-efficient than newer models. During a home inspection, we provide you with valuable information about the age of these key systems, allowing you to make informed decisions about potential repairs or replacements.

Partner with Mason Home Inspections

Understanding the typical lifespan of major home systems is just one piece of the puzzle when it comes to homeownership. At Mason Home Inspections, serving Minnesota, including areas around the Twin Cities, we provide comprehensive home inspection services to give you a clear understanding of the property you’re interested in. As a licensed general contractor (#BC807583) and experienced inspector, Brandon Palmer brings a keen eye for detail to every inspection. Whether you’re buying your first home or selling your long-time residence, we’re here to help you navigate the process with confidence. Visit our website at https://www.masonhomeinspections.com to learn more and schedule your home inspection today.

When buying a newly constructed home, many people assume that everything will be perfect. After all, the house is brand new—shouldn’t it be free of problems? Unfortunately, that’s not always the case.

At Mason Home Inspections, we often inspect new homes and discover issues that would surprise most buyers. From minor workmanship flaws to more serious code violations, a home inspection on a new build is a smart, proactive step that can save you time, money, and headaches in the long run.

Here are several key reasons why you should always get a home inspection, even if your new home just received its certificate of occupancy.

1. Builders Are Not Infallible

Builders work with multiple subcontractors, including framers, electricians, plumbers, HVAC technicians, roofers, and more. Even with the best intentions and oversight, mistakes happen. It’s common for construction schedules to be tight, and sometimes details fall through the cracks.

As a licensed contractor myself, I’ve seen homes where:

  • Electrical junction boxes were left uncovered in attic spaces.

  • Roof vents were installed incorrectly or are missing flashing.

  • Plumbing pipes weren’t securely strapped or properly sloped.

  • Insulation was poorly installed or completely missing behind bathtubs or attic knee walls

These aren’t “doomsday” scenarios—but they are things you want fixed before moving in, while you’re still covered under the builder’s warranty.


2. Code Compliance Doesn’t Equal Quality

Local building inspectors perform required code inspections throughout the construction process. However, these municipal inspections are typically brief, and focused only on minimum code compliance.

That means:

  • Cosmetic issues like misaligned trim or paint overspray may be missed

  • Subpar craftsmanship may go unnoticed if it doesn’t violate code

  • Fast walkthroughs may miss areas that aren’t easily visible or accessible

Hiring an independent home inspector provides a more thorough, unbiased evaluation focused solely on your interests as the future homeowner.


3. Peace of Mind During a Major Investment

A new home is likely the biggest purchase you’ll ever make. Having a professional inspection gives you peace of mind that the home was built correctly—and if it wasn’t, you’ll have clear, written documentation to bring to the builder.

Most builders offer a one-year warranty for workmanship and materials. If you don’t discover defects until after that window closes, the cost of repairs will fall entirely on you. An inspection helps you catch issues early, so you can work with the builder to get them resolved under warranty.


4. You’ll Learn How the Home Works

One often-overlooked benefit of a new home inspection is the opportunity to learn about your home’s systems. A good inspector will explain how your HVAC system is set up, how to shut off your water main, and where to find critical maintenance items like air filters and sump pumps.

Think of it as an owner’s manual walkthrough tailored specifically for your property.


5. Even “Perfect” Homes Can Have Hidden Defects

New doesn’t always mean flawless. We’ve inspected homes where:

  • The attic venting was incomplete, leading to trapped heat and future mold risk

  • Foundation cracks were already forming due to poor drainage grading

  • Smoke detectors weren’t wired or interconnected correctly

  • Exterior siding had gaps that would eventually allow water intrusion

None of these things were visible during a casual walkthrough. All of them would have turned into expensive problems if left unaddressed.


Don’t Skip the Final Step

If you’re building a new home, don’t let the excitement of moving in override the importance of a final inspection. At Mason Home Inspections, we offer new construction inspections tailored to identify hidden issues before you take possession. We’re licensed, experienced, and detail-oriented—because we know what to look for, and we work for you, not the builder.

Let us help ensure your dream home doesn’t come with hidden surprises.


Schedule Your New Construction Inspection Today

Visit www.masonhomeinspections.com or call 651-786-9988 to book your inspection or request a quote. Serving Center City and the greater Twin Cities area, we’re here to help you make informed decisions with confidence.

Cold Climate Minnesota


Buying or selling a home in Minnesota presents unique challenges, and your home inspection should reflect these specific needs. Our four-season climate, with harsh winters, freeze-thaw cycles, and humid summers, creates specific conditions that affect homes differently than in other regions. At Mason Home Inspections, we know that a high-quality inspection in Minnesota means going beyond the basics. It means paying close attention to how our climate wears on structures over time.

Below are key areas Minnesota home inspectors must scrutinize to protect buyers, sellers, and the long-term condition of a home.


1. Roofs That Work Overtime

Minnesota winters are brutal on roofing systems. Snow loads, ice dams, and extreme temperature swings create conditions that can shorten roof life significantly. Inspectors should:

  • Evaluate the age and material of the roofing system, especially asphalt shingles prone to granular loss and curling.

  • Check for signs of past ice damming: water stains near eaves, deteriorated fascia boards, and damaged gutters.

  • Confirm adequate attic ventilation and insulation, as poor airflow contributes to ice buildup.

A roof that looks fine in July might not survive February.


2. Foundation Cracks and Frost Heave

Cold climates cause the ground to shift. In Minnesota, this can lead to frost heave and movement in foundations, especially in older homes or improperly backfilled properties.

  • Inspect for stair-step cracks in block foundations and horizontal shearing, which may indicate structural concerns.

  • Use a moisture meter in basements and crawlspaces. Freeze/thaw cycles often force water through minor cracks, and hidden mold can follow.

  • Look for signs of improper grading and downspout extensions that could worsen freeze-related movement.


3. Insulation and Energy Efficiency

In a state where heating costs are a significant annual expense, a home’s insulation and air sealing are critical to both comfort and safety.

  • Verify attic insulation depth and condition. Minnesota homes ideally need R-49 or greater.

  • Look for missing or compressed insulation around rim joists, attic hatches, and knee walls.

  • Check for air leaks around doors, windows, and electrical penetrations—especially in older homes.

Modern energy standards aren’t always met in existing homes. Calling out insulation deficits can save buyers thousands over time.


4. Heating Systems: Safety and Lifespan

A dependable heating system isn’t optional in Minnesota—it’s essential.

  • Inspect furnaces or boilers for rust, cracks, backdrafting, and improper venting.

  • Document the age of the system and last recorded service. Heating equipment over 15–20 years old may be nearing replacement.

  • Ensure carbon monoxide detectors are present near bedrooms and mechanical rooms. Improper combustion or blocked flues can be deadly.

Don’t overlook humidifiers attached to the furnace; if neglected, they’re a source of mold and calcium buildup.


5. Ice Damage and Water Intrusion

Minnesota homes are vulnerable to freeze-related water issues from both above and below.

  • Inspect exterior trim, siding, and caulking for separation or rot, especially around windows and doors.

  • Check sump pump function, location of discharge lines, and presence of backup systems.

  • Look at soffits and roof valleys for signs of historic ice dam overflow.

Buyers want peace of mind—confirming that a home is dry and stays that way is a big part of that.


6. Detached Structures and Decks

Decks, sheds, and garages often bear the brunt of Minnesota winters.

  • Probe deck posts and framing for rot near the ground line. Many weren’t built with proper footings to handle frost depth (42 inches or more).

  • Confirm structural connections, flashing, and guardrails meet modern safety standards.

  • Inspect detached garages for heaving slabs or water intrusion around the perimeter.


Final Thoughts: Local Experience Matters

A home inspection in Minnesota should never be generic. Weather extremes, older housing stock, and regional building practices make it essential that your inspector understands local risks. At Mason Home Inspections, we bring a Minnesota-built mindset to every job—looking beyond what’s visible to uncover what’s possible in our climate.

Whether you’re buying your first home or preparing to sell your family cabin, trust an inspection team that knows what winter really means. Schedule your inspection today and gain more than a report—you’ll gain confidence.

👉 Book your Minnesota home inspection now

If you’re building a new home or funding a construction project, you’ve likely heard the term “inspection”. But what exactly does it mean—and why is it so important?

Whether you’re a contractor, real estate investor, or homeowner building from the ground up, understanding inspections is key to keeping your project on time, on budget, and in good standing with your lender.

What Is a Draw Inspection?

An inspection is a site visit conducted by a licensed inspector or third-party verifier to confirm the progress of a construction project before a lender releases the next round of funds.

Banks and private lenders use draw inspections to:

  • Verify completed work matches the requested payout
  • Ensure loan funds are being used appropriately
  • Prevent fraud and overpayment
  • Monitor project timelines and compliance

When Are Inspections Performed?

Most construction loans are distributed in phases. An inspection is typically scheduled:

  1. After excavation and foundation work
  2. Once framing is complete
  3. At mechanical rough-in and pre-drywall stages
  4. After interior finishes
  5. At final completion or certificate of occupancy

What Does the Inspector Look For?

During a draw inspection, the inspector will:

  • Verify line items on the draw request are completed
  • Document the progress with photos
  • Check for code compliance and quality
  • Identify any delays, issues, or discrepancies
  • Provide a written report to the lender

The goal isn’t a full home inspection—it’s focused on progress and payment accuracy.

Why Are Inspections Important?

For lenders, inspections reduce financial risk and offer a structured process to verify each phase of construction before releasing additional funds. This oversight ensures the project is moving forward as planned and limits exposure to incomplete or substandard work.

For contractors and developers, inspections help maintain transparency, reduce billing disputes, and improve credibility with both clients and lenders. Knowing an independent inspector will verify each milestone can also motivate subcontractors to deliver timely, high-quality work.

For homeowners, inspections provide peace of mind. You’ll know that what’s being billed is actually built—and that your construction loan is being used wisely and responsibly.

Who Performs Inspections?

Licensed home inspectors, construction consultants, or third-party firms with experience in residential and commercial builds typically perform inspections. At Mason Home Inspections, we specialize in reliable, detailed inspections for lenders and builders throughout Chisago, Isanti, Kanabec, Pine, Anoka, Ramsey, Dakota, and Washington counties.

How Long Does an Inspection Take?

  • On-site visit: 15–45 minutes depending on project size
  • Report turnaround: Usually within 24 hours

Fast reporting keeps projects moving and funds flowing.

How Much Does a Draw Inspection Cost?

Prices range from $100 to $250 per inspection depending on location, project complexity, and travel distance. Some larger projects or remote builds may require an additional fee.

While some may see it as an added expense, an inspection is a cost-effective way to protect against delays, disputes, and costly rework. Compared to the potential financial losses from fraud or mismanagement, the inspection fee is a smart investment in project security.

Many lenders now require inspections as part of the loan agreement—and skipping them could delay payouts or lead to funding freezes if progress isn’t properly documented.

Final Thoughts

Inspections aren’t just a formality—they’re a critical tool for protecting your investment, building trust, and ensuring your project stays on track. If you’re building in Minnesota and need a reliable inspection partner, Mason Home Inspections offers timely, clear, and professional reports tailored to lender requirements.

We understand the importance of speed and accuracy in the construction funding process. That’s why we commit to fast site visits, thorough documentation, and responsive communication every step of the way.

Contact us today to schedule an inspection or request a sample report. Let’s keep your build moving forward—safely and efficiently.


  1. Suppose you plan to buy or sell a home anywhere in Chisago County, Washington County, or the greater North Metro area. In that case, a detailed inspection is your first line of defense against unwelcome surprises. Mason Home Inspections has evaluated hundreds of properties through Minnesota’s harsh winters and humid summers, and we continue to see the same handful of issues week after week. Left alone, each one can snowball into a significant expense, yet most are simple to correct when caught early.

Below, you will find six problems we encounter most often, along with their significance in our climate, and step-by-step fixes that you can start implementing this weekend. After reading, book your inspection or check our fee schedule to add a sewer scope or radon test for complete peace of mind.


1. Attic Insulation Gaps and Ice‑Dam FormationInsulation

Minnesota’s stack effect drives warm interior air toward the roofline. When insulation is inadequate or uneven, heat leaks through the sheathing, melts rooftop snow, and the meltwater refreezes along cold eaves. That ridge of ice traps more water, loosens shingles, and soaks the roof deck. Interior leaks, ruined drywall, and mold often follow.

Smart fix:

  1. Seal top‑plate cracks and recessed light boxes with foam,

  2. Blow loose‑fill cellulose or fiberglass to at least R‑50,

  3. Verify that the soffit baffles remain unobstructed to ensure continuous ventilation.

A professional air‑sealing and insulation job averages $1,500 to $2,200 and can shave ten percent off winter energy bills.


2. High‑Moisture BasementsMoisture Test

Our freeze‑thaw cycles push moisture vapor through porous concrete. We regularly log relative humidity above 60 percent, a level that can rust furnace shells and foster mildew behind stored cardboard. Persistent damp also attracts carpenter ants in warmer months.

Smart fix:

  • Slope soil away from the foundation at one inch per foot for six feet,

  • Extend downspouts with corrugated pipe,

  • Install a permanent, self-pumping dehumidifier set to 50% humidity.

For additional guidance, the Minnesota Department of Health offers a helpful moisture guide. Bookmark it for weekend reading.


3. Federal Pacific, Zinsco, and Split‑Bus Electrical Panelsa circuit panel

Though “grandfathered,” these legacy panels have documented failure rates that far exceed modern breakers. Overheating lugs and frozen trip mechanisms create an elevated fire hazard. Many insurers now flag them during underwriting, forcing last‑minute negotiations.

Smart fix: Replace the main service with a 200-amp modern panel, add whole-house surge protection, and clearly label circuits for future trades. Expect $2,500 to $3,500, a fraction of the potential claim if the panel fails.


4. Dryer Venting Into Crawl Spaces or Garages a pipe in a corner of a room

We still encounter homes, especially those built between 1960 and 1980, where the dryer exhaust stops short of the exterior. Humid, lint‑laden air condenses on framing, promotes decay, and forms a buffet for rodents. Interior CO alarms can also trigger when a gas dryers backdraft.

Smart fix:

  • Replace any plastic flex hose with 26‑gauge smooth metal duct,

  • Limit bends to two, keep total run under thirty‑five feet,

  • Terminate with a flap damper that opens freely.

Materials cost under $100. Your laundry will dry more quickly, saving energy with every cycle.


5. Neglected Furnace Air Filtersa hand opening a dirty air filter

In Forest Lake and North Branch, we regularly pull filters so clogged that duct static pressure surges forty percent, starving the heat exchanger. The blower motor labors, energy bills climb, and the lifespan of a $4,000 furnace shrinks dramatically.

Smart fix: Pop in a fresh pleated filter every sixty to ninety days, vacuum the return grille, and schedule a professional tune‑up each fall. That twenty‑dollar habit can delay furnace replacement by several years.


6. Shrinking Window and Door FlashinginstallFlashing

Wide temperature swings cause aluminum drip‑edge and rubberized flashing to pull away from sills. Water follows the fasteners directly into the framing cavity, often remaining unnoticed until interior paint bubbles appear. Early detection is key in our freeze‑thaw climate where moisture expands once trapped.

Smart fix:

  1. Inspect head flashing above all windows each spring,

  2. Reseal gaps with high‑quality polyurethane caulk,

  3. Where flashing has lifted, remove siding locally and install self‑adhered flashing tape before reinstalling trim.

DIY cost is minimal, yet ignoring the issue can rot framing and force expensive window replacements.


Why Early Detection Matters Here

  • Climate amplification: Cold winters and humid summers accelerate damage that might stay dormant in milder regions.

  • Insurance scrutiny: Carriers increasingly request inspection data. Proactive repairs can preserve policy eligibility.

  • Negotiation leverage: An inspector’s objective report arms you to request seller credits or price adjustments.

  • Occupant health: Moisture and combustion issues degrade indoor air quality, aggravating allergies and asthma.


Next Steps

  1. Schedule an inspection: Call or text 651.786.9988 with the property address, desired date, and your contact info. If possible, include an email so we can send the pre‑inspection agreement electronically.

  2. Consider add‑ons: Sewer scopes, radon testing, and infrared scans identify hidden risks and are far cheaper than after‑the‑fact repairs.

  3. Follow the report: We deliver a digital report within twenty‑four hours, complete with annotated photos, cost estimates, and a repair‑priority list you can hand directly to contractors.

Serving Chisago County, Washington County, and the whole north‑metro Twin Cities

A quick story from the field

a wood paneling with black text and mold

Last month, in Taylors Falls, I opened the access panel behind a jetted tub and found the OSB sheathing dark as a Minnesota winter morning. A pin‑hole leak in the supply line had been misting the cavity for years. The sellers swore they “only filled the tub on special occasions,” yet the subfloor read 22 percent moisture, far above the safe 16 percent threshold. That small anecdote sums up why inspectors obsess over the bath‑versus‑shower debate. Water is sneaky, and the way you bathe changes how it behaves.

1. Water use

  • Full tub: The U.S. EPA pegs a filled bathtub at about 70 gallons of water STANFORD magazine.

  • Typical bath: Municipal studies show the average soak lands closer to 30 gallonsPortland.gov.

  • Eight‑minute shower: With a 2.1 gpm low‑flow showerhead, you are around 17 gallonsPortland.gov.

In short, short showers almost always beat baths in terms of water consumption. Longer, spa‑style showers punch above 25 gallons and can erase the savings quickly. If you are eyeing upgraded fixtures, the EPA WaterSense Shower Better campaign lays out simple swaps that save thousands of gallons a year, worth a read if you own property in water‑conscious Washington County. Visit the EPA guide.

2. Moisture risk

Bathtubs concentrate water in a single vessel but raise three red flags:

  1. Splash zone – Kids cannonballing can defeat any caulk bead.

  2. Decked tubs – Drop‑ins surrounded by wood trim invite hidden leaks.

  3. Overflow gaskets – Rubber gaskets harden and drip down the drain stack unnoticed.

Showers spread moisture across larger surfaces. Common issues I document in north‑metro homes include poorly sloped curbs, cracked grout at corners, and ventilator fans undersized for the steam load. Walk‑in showers without thresholds are trending, yet they demand flawless pitch and continuous waterproof membranes—details some flippers skip.

3. Resale value

Local appraisers tell me that in Chisago County starter homes, a functional shower in at least one full bath satisfies most buyers. High‑end listings in Stillwater and Forest Lake still command a premium for a soaking tub in the primary suite. National Remodeling Magazine surveys put a 67‑71 percent return on mid‑range bathroom updates; however, the intangible wow‑factor of a freestanding tub often seals deals faster in competitive markets. My advice is simple: prioritize a shower for daily efficiency, add a tub only if space and budget allow—and always waterproof like the next owner is an inspector.

What your inspector really checks

Component Bathtub Focus Shower Focus
Visible plumbing Supply valves, overflow gasket, pump Mixing valve, showerhead flow rate
Structure Subfloor deflection, joist notching Pan pitch, curb waterproofing
Ventilation Fan CFM vs room volume Same, but more critical for steam
Safety Slip resistance, grab bars Tempered glass, anti‑scald control

Pro tip: scope the sewer while we are there

Whenever a bathroom remodel crops up I suggest adding a sewer camera inspection. A partially clogged line will make that new shower pan useless in a hurry. You can see the add‑on cost on our fees page and decide if the peace of mind is worth it. Eighty percent of my sewer scopes in older Washington County homes discover root intrusion, just saying.

Final thoughts

Whether you love a candle‑lit soak or a five‑minute power shower, remember that water savings, moisture control, and resale appeal all hinge on proper installation. When Mason Home Inspections walks through a property, we treat plumbing as a system, not a fixture. Ready to get the full story on your future home? Book an inspection today and let a neighborly expert keep your investment dry, efficient, and market-ready.

Thorough outlet testing is one of the quickest ways to judge the health of a home’s wiring, and it can save clients from nasty surprises after move-in. Follow this streamlined roadmap, and you will verify every accessible receptacle in minutes while showing off professional polish.


1. Start with a quick visual sweep

Before any meters come out, scan the plates. Cracks, scorch marks, sloppy paint, or a loose yoke indicate that an electrical fault may be brewing behind the drywall. In wet or unfinished spaces, note any receptacle that is not stamped “GFCI” or “WR.” Those observations take seconds and often predict what your testers will show next.

2. Assemble a lean, capable toolkit

At the heart of the kit sits the Klein Tools RT250 GFCI Outlet Tester with LCD Display. It shows real-time voltage, names the exact wiring fault, and displays GFCI trip time right on a bright back-lit screen. Flank it with a non-contact voltage detector, a digital multimeter, and (when the panel uses arc-fault breakers) a combo AFCI tester. A headlamp, insulated screwdriver, and your phone camera round things out.

3. Follow the five-step field routine

  1. Verify the circuit is live. Hover the non-contact probe near the plate until it chirps.
  2. Plug in the RT250. Two green lights plus the LCD reading “CORRECT” means hot, neutral, and ground are all where they belong. Any other combination exposes open ground, reversed polarity, or open neutral conditions.
  3. Trip the GFCI. Press the built-in button on the RT250 at every receptacle serving kitchens, baths, laundry rooms, garages, basements, and exteriors. The outlet (or its upstream device) should trip immediately. The InterNACHI Standards of Practice require you to describe any GFCI that fails during testing.
  4. Reset and retest. Hit the reset on the receptacle or breaker, then confirm power and correct wiring again.
  5. Investigate odd readings with a multimeter. Measure hot-to-neutral, hot-to-ground, and neutral-to-ground. Expect roughly 120 V between hot and the other conductors, and near-zero volts between neutral and ground. These measurements expose bootleg grounds or shared-neutral issues that simple lamp testers can miss.

4. Document as you go

Note the location, tool, reading, and recommended fix right in your report. Snap a photo of the RT250’s LCD beside the outlet, so the electrician can find the exact device later. Clear notes and pictures cut down on call-backs and make you look organized.

5. Recognize and explain common defects

  • Reversed polarity – hot landed on the neutral screw; polarized plugs can become energized when unplugged.
  • Open ground – often seen where three-slot receptacles replaced two-slot outlets with no bonding. Surge suppressors lose their safety path.
  • GFCI does not trip – failed device, miswired feed-through, or no GFCI protection at all.
  • Loose contacts – if a plug sags or falls out, worn springs can overheat under load.

Always recommend evaluation and repair by a licensed electrician rather than prescribing do-it-yourself fixes. That keeps your scope tight and your liability low.

Looking ahead

Recent National Electrical Code editions require tamper-resistant (TR) receptacles throughout nearly every dwelling space. If the home was built or remodeled under those editions, call out any non-TR device mounted below five feet six inches. TR shutters help keep curious kids from inserting objects into live slots—a low-cost upgrade that sells itself in the report.

Smart outlets, self-testing GFCIs, and combo AFCI / GFCI devices are also mainstream now. The RT250’s display shows trip time in milliseconds, letting you flag “slow” devices long before they become unsafe. Some inspectors even carry Bluetooth testers that log voltage drop under a simulated load, giving clients an energy-efficiency insight alongside the safety data. Little touches like that set you apart and can justify a premium fee.


The payoff

Run this five-step roadmap on every accessible receptacle and you will catch most wiring defects quickly, build a rock-solid inspection report, and protect families from avoidable hazards. It is a small investment of time, but it pays back through safer homes, happier clients, and a reputation for thoroughness that keeps referrals rolling in.

a man standing next to a house Minnesota just set a bold timeline for energy-smart housing. A 2024 law (HF 5242A) moves the state to a three-year update cycle for the residential energy code starting in 2026, with a target of cutting a new home’s net energy use 70 percent by 2038 (Minnesota’s New Residential Energy Code Update Process: A Major Step Toward Energy Efficiency | Midwest Energy Efficiency Alliance). While that might sound like pure policy talk, it quietly changes what a thorough home inspection should cover beginning this year.


1. Why an energy-focused code matters to buyers and sellers

  • More airtight, better-insulated homes
    Inspectors will see thicker attic insulation, advanced air-sealing details, and mechanical ventilation systems designed to keep fresh air moving without wasting heat. Verifying that these elements were installed correctly protects buyers from costly comfort complaints later.
  • Equipment sizing and age
    The new code assumes smaller heating and cooling loads. If you are buying an older house that still has a monster 100 k BTU furnace, right-sizing that unit could slash annual bills. A home inspector can flag oversize or end-of-life equipment so you negotiate up front.
  • Future-proof appraisals
    Appraisers already factor energy features into market value. With code updates coming every three years, today’s “average” 2025 build could look dated next to a 2029 neighbor unless sellers document its efficiency. A detailed inspection report provides the proof.

2. Expect a new set of field tests

Municipalities are not yet demanding blower-door or duct-leakage numbers on every resale, but lenders and green financing programs are. Adding an optional blower-door test during inspection offers three benefits:

  1. Confirms the home meets or exceeds the code in effect when it was built.
  2. Spots hidden air leaks that foster ice dams and mold.
  3. Provides baseline data if you refinance through an energy-efficient mortgage later on.

3. Water quality alert – PFAS enters the chat

In April 2024 the Minnesota Department of Health announced 22 public water systems exceeding new federal PFAS limits (Health department says 22 Minnesota water systems have PFAS above new federal limits | MPR News). Cities from Brooklyn Park to Hastings now have five years to install treatment plants, and private-well owners are left to self-test.

For inspectors this means:

  • Offer PFAS sampling the same way we already cover radon.
  • Interpret lab results for clients unfamiliar with parts-per-trillion numbers.
  • Recommend point-of-use filters when results top the new EPA maximum.

Homeowners who can show a clean water report stand out in a market where “forever chemicals” are suddenly headline news.


4. How Mason Home Inspections is adapting

  1. Energy-ready checklist – We now document R-values, insulation coverage, ventilation type, and mechanical equipment sizing against the forthcoming 2026 code so buyers know where upgrades will be required.
  2. Optional diagnostic testing – Blower-door and infrared scans are available as add-ons. Early data helps prioritize air-sealing dollars.
  3. Expanded water testing panel – PFAS, nitrates, lead, manganese, hardness, and coliform bacteria can all be bundled. Results typically arrive in five business days.
  4. Plain-language reporting – Technical findings are translated into practical steps so clients understand what should be fixed now versus later.

Final thoughts

Minnesota is quietly rewriting the definition of a “code-compliant” home. The upcoming efficiency targets and stricter water-quality rules will reshape purchase negotiations, insurance underwriting, and even resale timelines. A modern home inspection has to look beyond shingles and outlets; it must verify that the invisible systems behind the drywall will meet tomorrow’s standards.

If you’re planning to buy or sell in 2025, schedule an inspection that tackles these new realities. We would be happy to walk the property with you, answer questions, and make sure the next owner steps into a safe, efficient, and healthy home.

Questions? Reach out anytime – we love talking houses, even the drafty ones.

  • a logo with a magnifying glass and a house

How to Schedule Your Inspection

1. Online Scheduling

For the fastest service, use our secure online scheduler:

👉 Schedule Now

When you schedule, you’ll receive a confirmation email detailing your appointment.

2. Phone Scheduling

Prefer to speak directly? Call us at 651.786.9988 to schedule your inspection. We’re available to answer your questions and help you with the booking process.

3. Email Scheduling

You can also email us at assistance@masonhomeinspections.com. Please include:

  • Property address

  • Your name, Phone number, and email address
  • Size and age of the home

  • Preferred inspection date and time

  • Any additional services needed

We’ll respond as soon as possible to confirm your appointment.


🔍 What to Expect During Your Inspection

Our certified inspectors conduct thorough evaluations, covering:

  • Structural systems

  • Roofing

  • Electrical systems

  • Plumbing

  • HVAC systems

  • Appliances

We adhere to InterNACHI’s Standards of Practice, ensuring a comprehensive assessment.


📄 After the Inspection

You’ll receive a detailed, easy-to-read report within 24 hours, complete with high-quality images and clear explanations. Our reports are accessible on any device and include a Repair Request Document generator for agents.


📍 Service Areas

We proudly serve Center City, MN, and surrounding counties, including but not limited to Chisago, Isanti, Kanabec, Pine, Anoka, Ramsey, and Washington.


At Mason Home Inspections, we’re committed to providing you with peace of mind through meticulous inspections and exceptional service. Schedule your inspection today and take the first step toward informed homeownership.

© Copyright Mason Home Inspections| Website by Spectora | Privacy Policy